Picked by 80K+✔✔【Worldwide Shipping】ORDER TODAY,GET FREE SPARE PARTS!🎁🎁FREE SHIPPING
“Obsessed with Energy Efficiency · Protecting the Planet”🌏

Panier

Votre panier est actuellement vide.

Faire des achats

Step-by-Step Guide to Installing Hexagon Grid

No electrician needed:Power cord with plug included,PLUG-AND-PLAY,ready to use,DIY into any shape like“LEGO”
connecting hexagon garage light border tubes with connectors

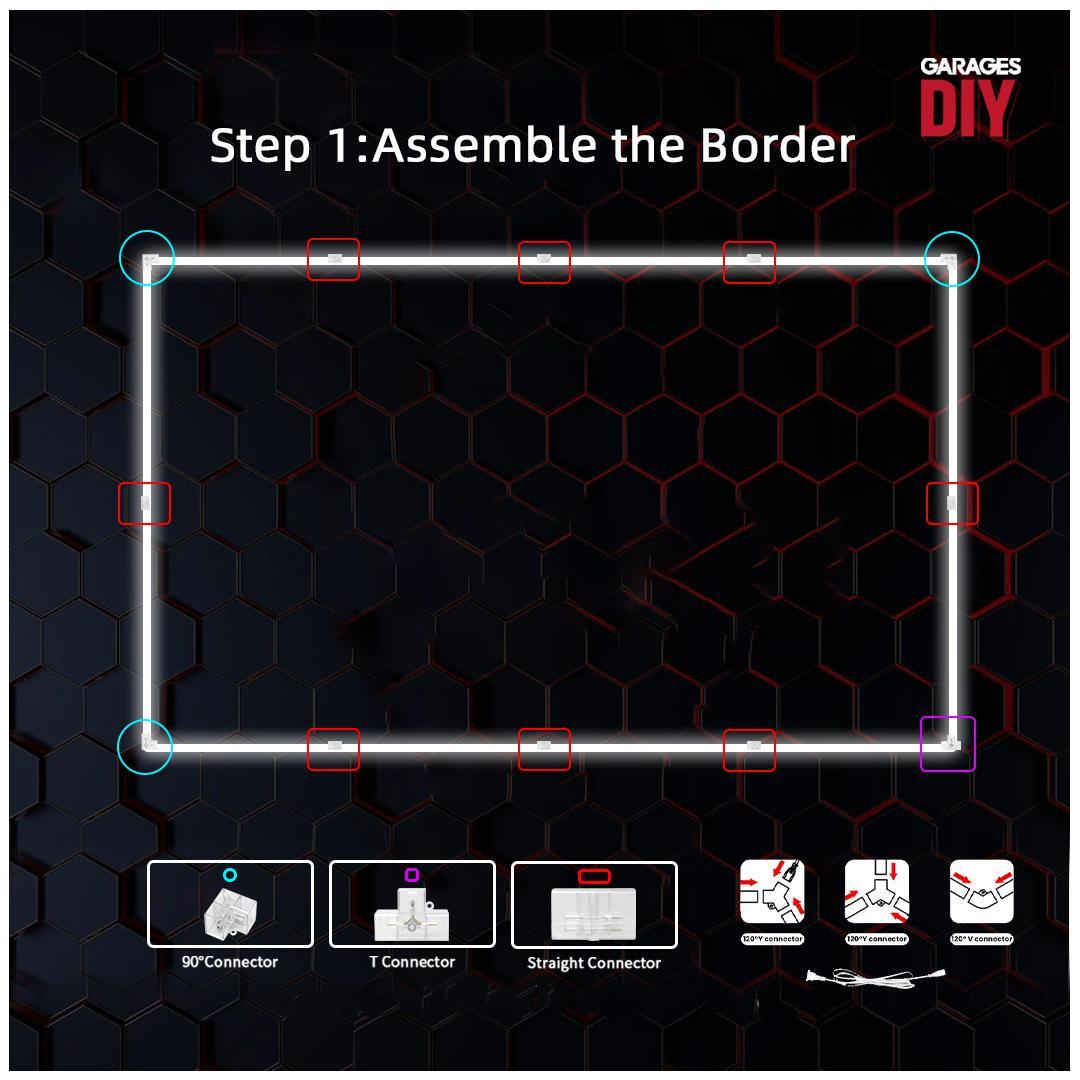
Step 1: Assemble the Border on the floor (If Applicable)

If your Hexagon LED lighting system contains a border, start by assembling the straight border first. Lay out the border pieces on the floor, using the straight and 90-degree elbow connectors to connect the tubes. Ensure each tube is fully inserted into the connector pieces. If your set does not contain a border, skip to Step 3.
easy DIY installation of hexagon garage light without electrician
plug and play hexagon garage light connected to power outlet
easy DIY installation of hexagon garage light without electrician
plug and play hexagon garage light connected to power outlet

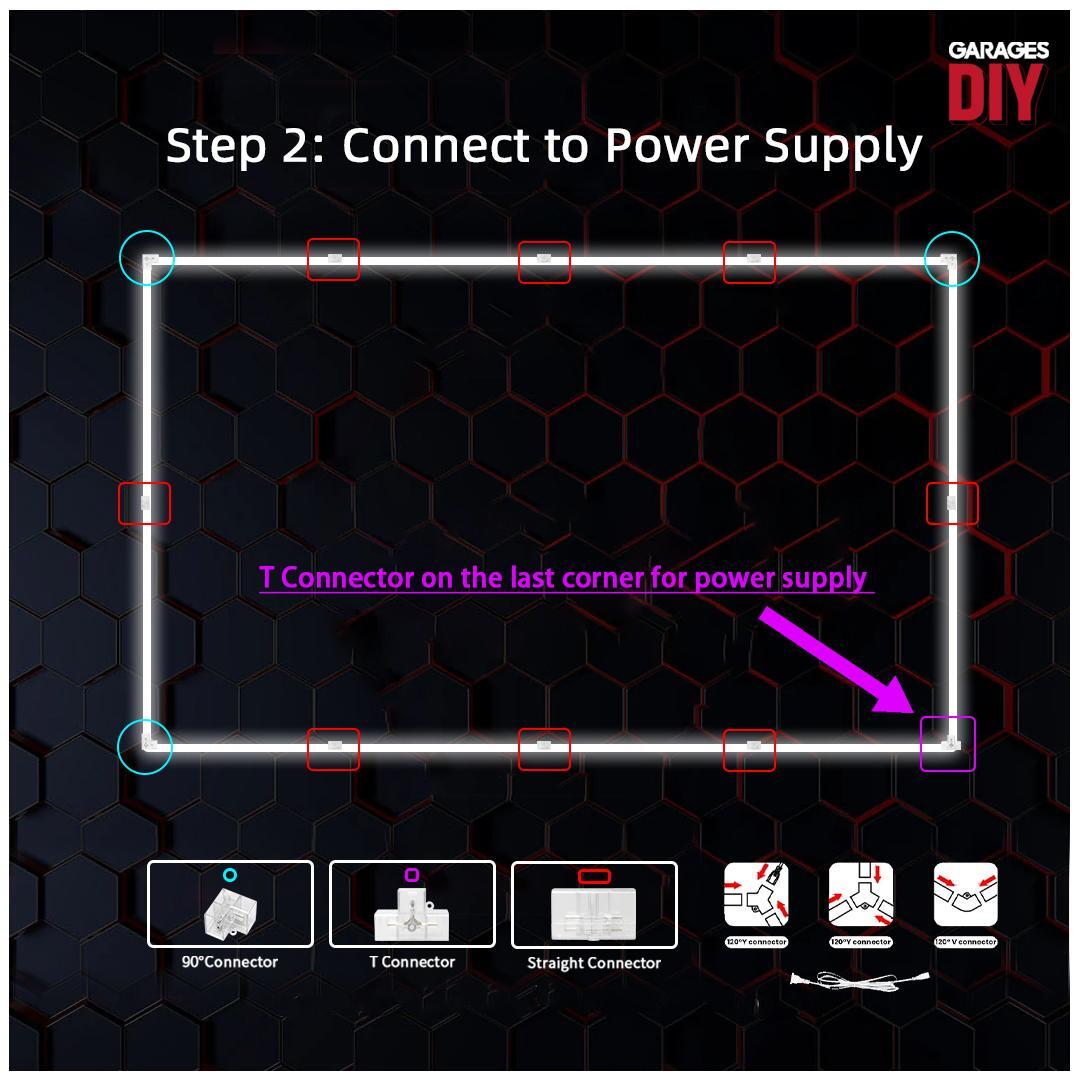
Step 2: Connect to Power supply on the floor

Use a T connector on the last corner of the border to later connect the border to your power supply. Assemble the entire border on the floor and test it before mounting.
connecting hexagon garage light tubes with connectors

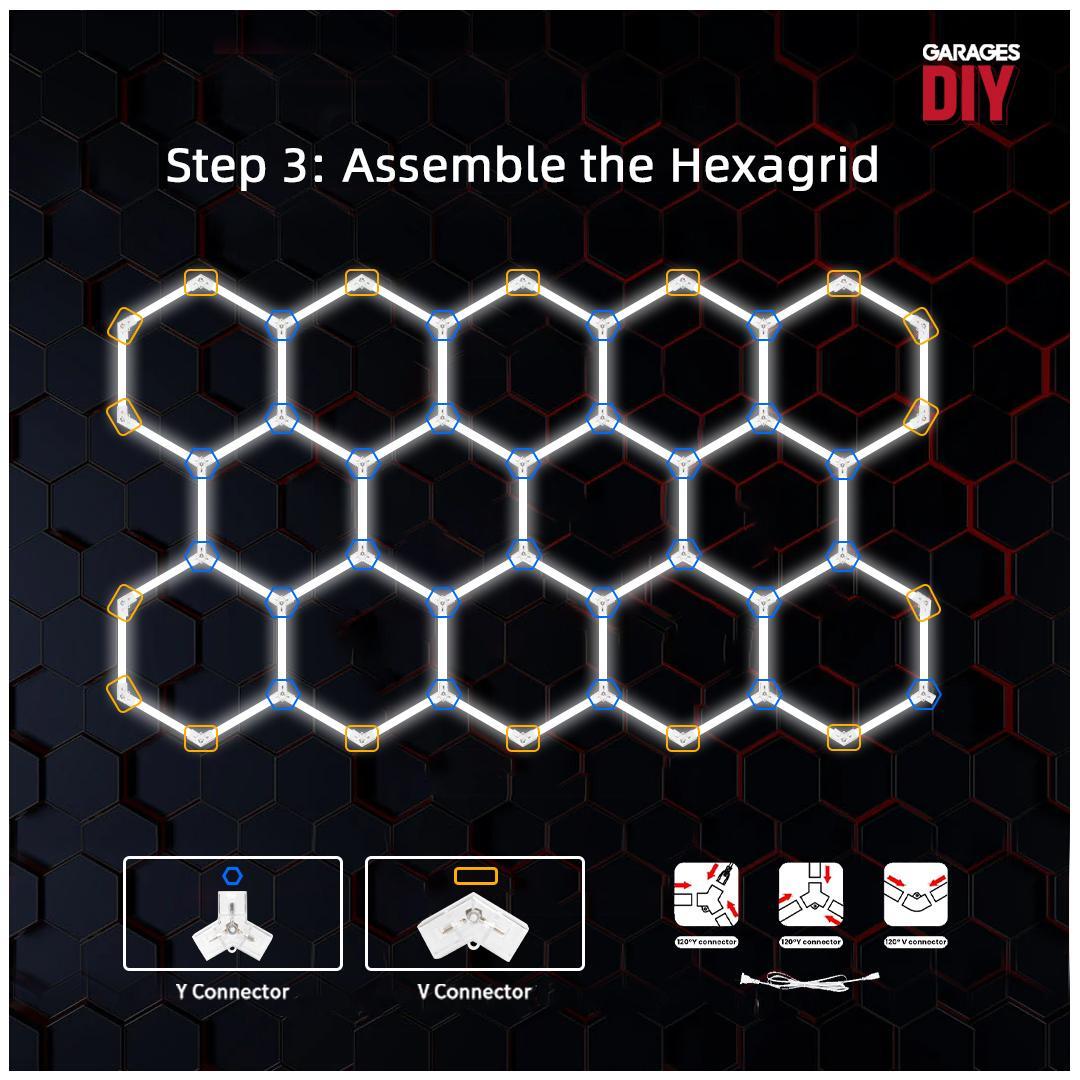
Step 3: Assemble the Hexagrid on the floor

Assemble the hexagridone by one according to the drawings, using Y connectors and V connectors,Ensure each tube is fully inserted into the connector pieces.
easy DIY installation of hexagon garage light without electrician
plug&play hexagon garage light connected to power outlet
easy DIY installation of hexagon garage light without electrician
plug&play hexagon garage light connected to power outlet

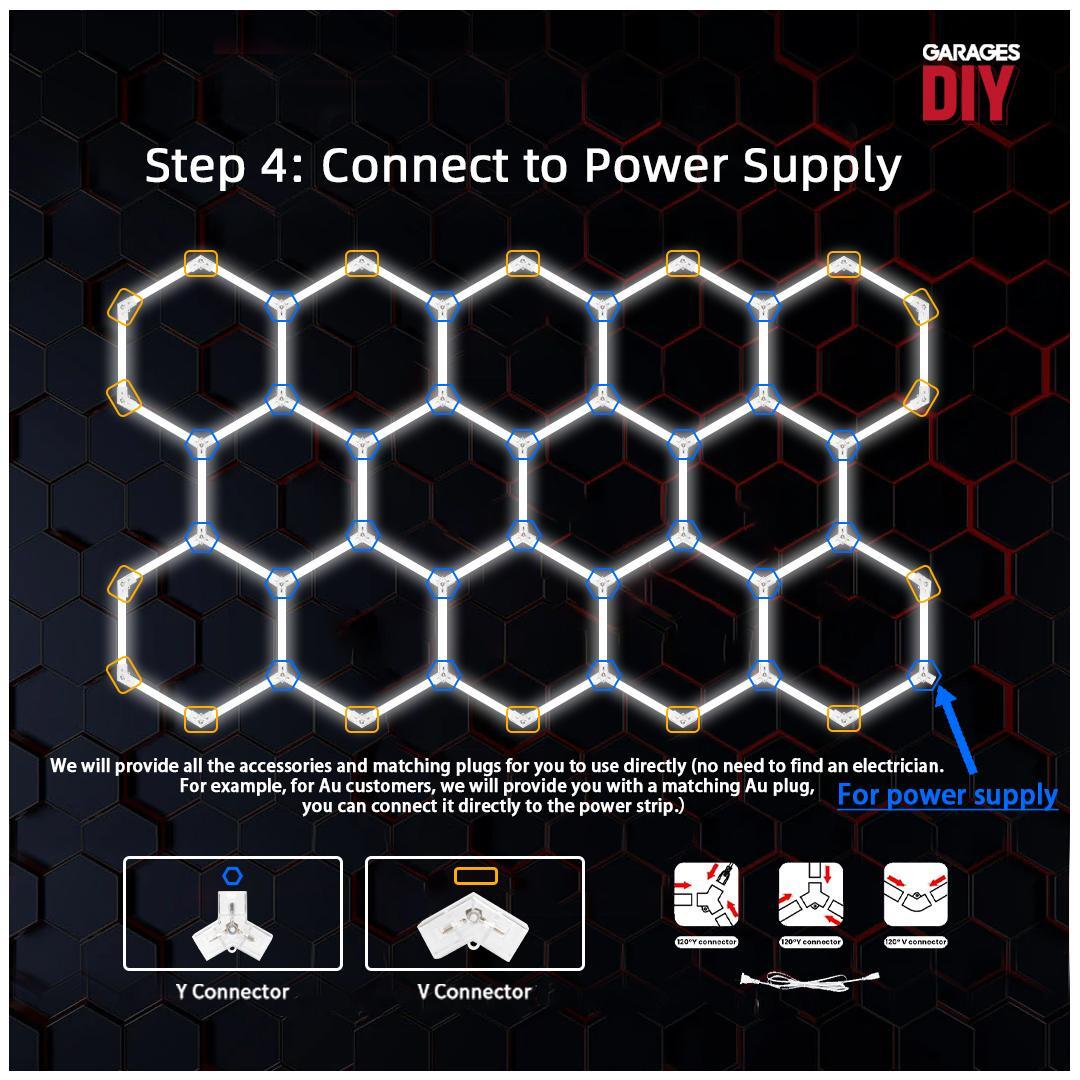
Step 4: Connect to Power supply on the floor

Use a Y connector on the last corner of the border to later connect the border to your power supply. Assemble the entire border on the floor and test it before mounting.
assembling hexagon garage light into custom layout

Step 5: Last check ready to install to ceiling

mounting hexagon garage light on the ceiling

Step 6: Install to ceiling or wall

If you have border, please install the border first and then install the hex
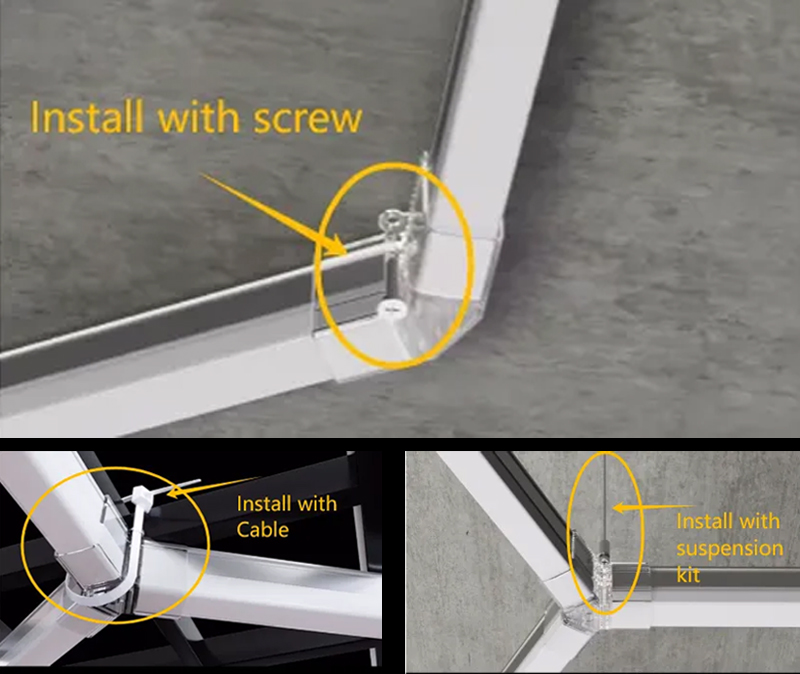
three installation methods for hexagon garage light including cable ties, suspension, and expansion bolt

We provide 3 installation methods

Suitable for direct installation on ceiling, steel frames, and hang.
(The package we send included screws and cable) (Need to purchase additional for suspension kit)
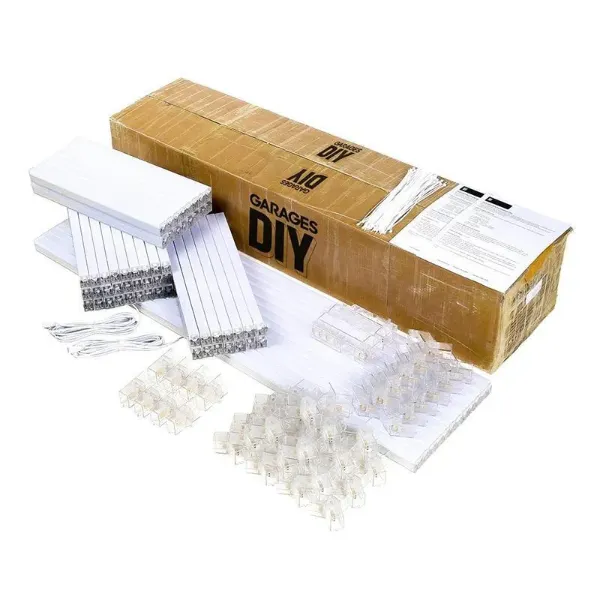
complete package contents of hexagon garage light including plug and play power cord

We will provide all the accessories and matching plugs

No need to find an electrician. For example, for UK customers, we will provide you with a matching UK plug, and you can connect it directly to the power strip.
If you need to connect directly to the circuit, contact a qualified electrician.